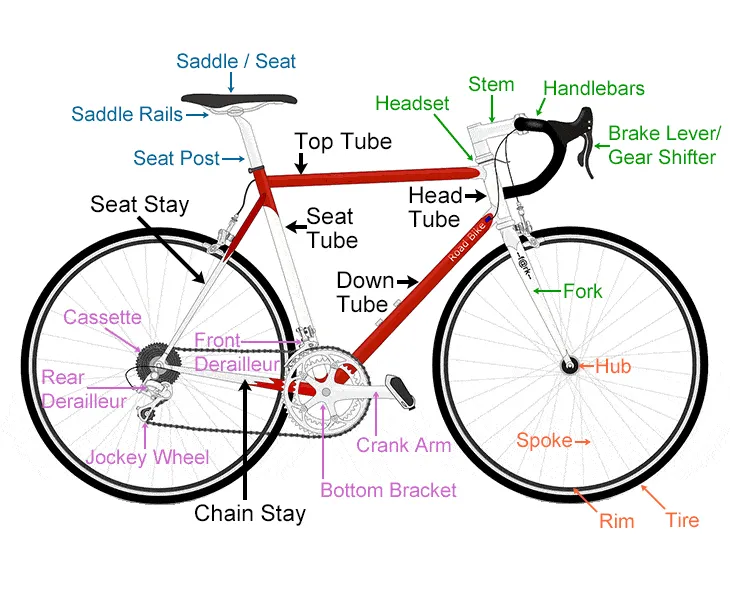
Walk into any bike shop and look at the handlebar section. Honestly, it’s a mess – in a good way. You’ll see bars that curve down, bars that go straight, bars that sweep back like a beach chair. They all look like simple tubes to hold, but here’s the thing: they completely change how your bike feels. After wasting money and hurting my wrists more times than I’d like to admit, I finally learned that picking the wrong handlebar can turn a fun ride into a painful chore.
I’m not a pro mechanic. I’m just a guy who’s tested 7 different handlebars over the last few years – on my commuter bike, my weekend gravel rig, and a road bike I barely survived. And I wrote this guide because too many beginners (including my past self) just copy what others use, then end up with back pain, numb hands, or terrible control.
So let me break down six common handlebar types, what they’re actually good for, and – more importantly – who should avoid them. No fluff, no marketing speak.
1. Drop bars – great for speed, but don’t buy them for coffee runs
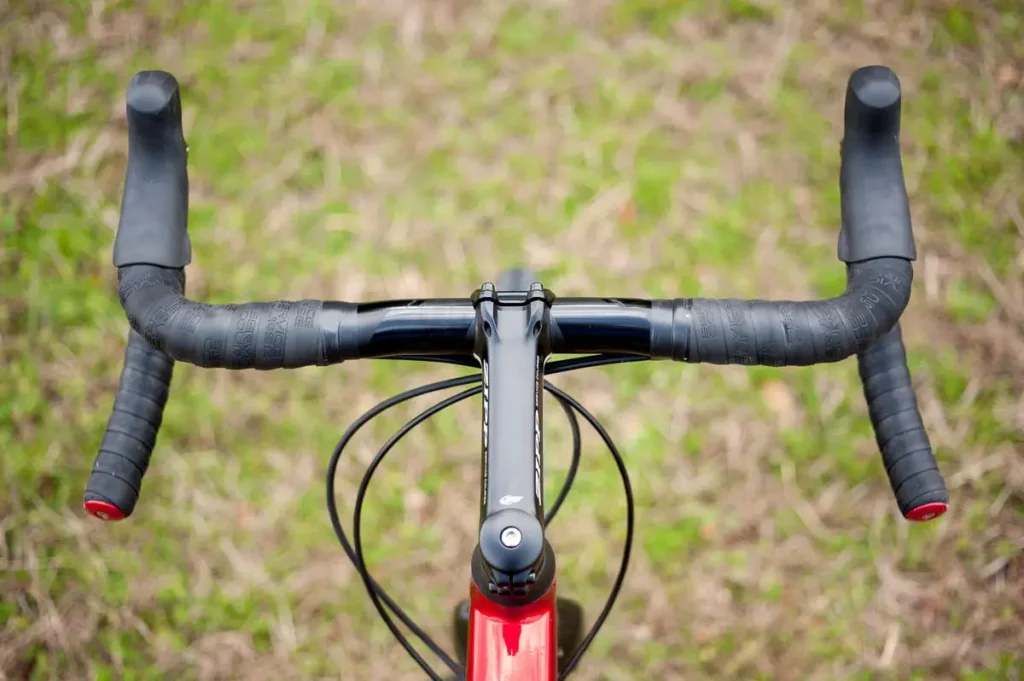
You know these: the classic curly, downward-curving bars on road bikes. Super recognizable.
Why people love them
You get three hand positions: on the top flat part (relaxed), on the hoods near the brakes (everyday riding), and down in the drops (sprinting or fighting headwinds). I did a 100‑km ride last summer switching between positions every 15 minutes or so, and my wrists felt fine. Try that with flat bars – you can’t.
Materials matter
- Carbon fiber: light, soaks up road buzz, but expensive. A decent carbon drop bar starts around $200.
- Aluminum: cheaper ($40‑80), sturdy enough for daily riding. I actually prefer aluminum for training – one drop and carbon might crack.
Who should get it
Road racers, long‑distance pavement riders. Not you if your back hurts after 30 minutes in a lean‑forward position.
2. Flat bars – the practical workhorse, but your hands will get tired
Flat bars are what you see on most mountain bikes and city commuters. Straight, simple, one hand position unless you add little bar ends (which I highly recommend).
The good
They put you in a natural, upright posture. Wider than drop bars, so you get better stability on rough roads or crowded bike paths. I use flat bars on my grocery‑getter bike – easy to maneuver, easy to see traffic.
The bad
Aerodynamics? Almost zero. On a long flat road above 25 km/h, you’ll feel like a sail. Also, gripping the same spot for over an hour made my palms sore until I added ergonomic grips.
Best for
Daily commuting, casual trails, city riding. Not for road racing or long highway‑style rides.
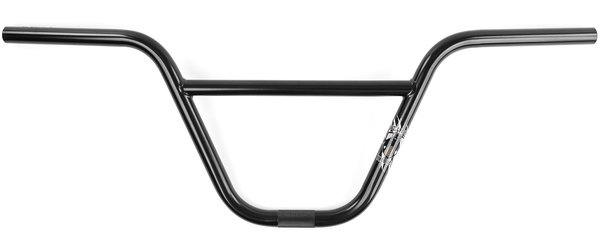
3. Riser bars – my favorite for bumpy off‑road trails

Think of riser bars as flat bars that got a lift. They sweep up and back, so your hands sit higher and closer to you.
Real‑world experience
Last fall I took a riser bar bike on a rocky forest trail. The upright position saved my lower back – no kidding. And the extra width (most are 64‑80cm) gave me so much leverage that I stopped fearing loose gravel.
Most riser bars are aluminum, strong and cheap. Carbon versions exist but honestly, for off‑road, I’d rather have aluminum that can take a hit.
Who shouldn’t buy them
If you care about speed or ride mostly on smooth pavement, skip risers. They’re too wide for weaving through traffic, and you’ll get dropped by roadies.
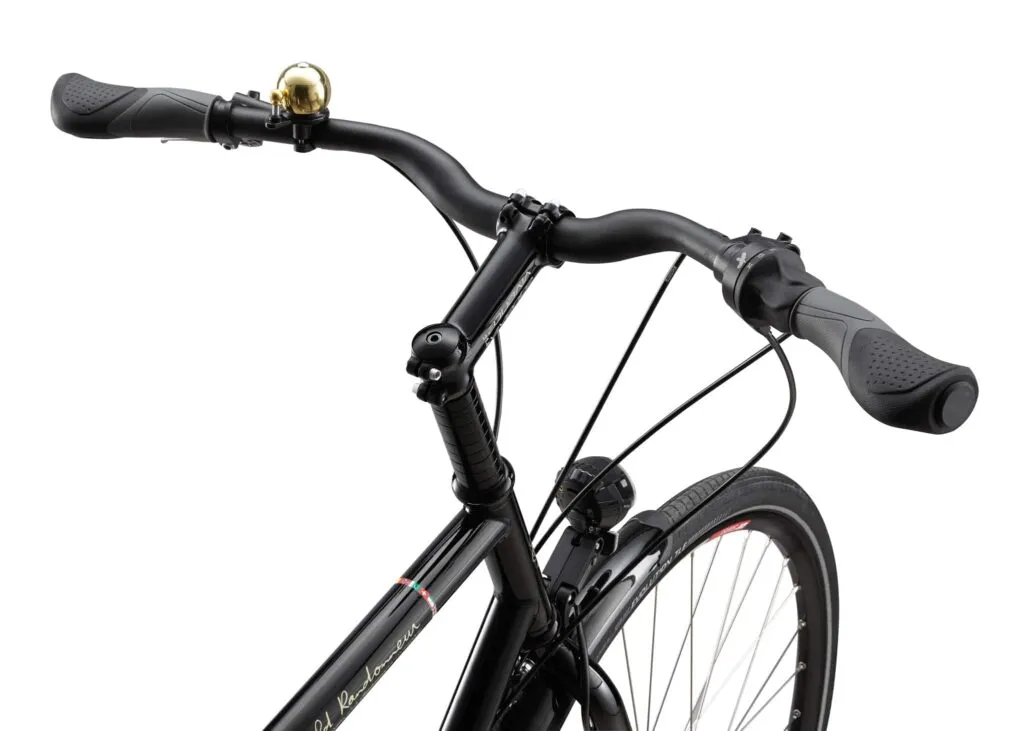
4. Cruiser bars – pure comfort, zero speed
Also called beach cruiser bars. They sweep way back and up, so you sit bolt upright like you’re on a lawn chair.
The vibe
I borrowed a friend’s cruiser for a seaside ride last summer. It was glorious for 10 km – no hand pressure, no neck strain. But when I hit a slight uphill into the wind, I felt like I was pedaling through mud.
These bars are usually steel or aluminum, heavy (often 500g+), and they come with thick soft grips. You can also mount a basket, cup holder, or a little flag – very lifestyle.
Perfect for
Short trips to the beach, casual neighborhood rides, or anyone who says “I don’t care about speed.”
Avoid if you ride more than 15 km at a time or need to make quick turns. The wide sweep makes U‑turns surprisingly awkward.
5. Gravel bars – the all‑rounder that actually works
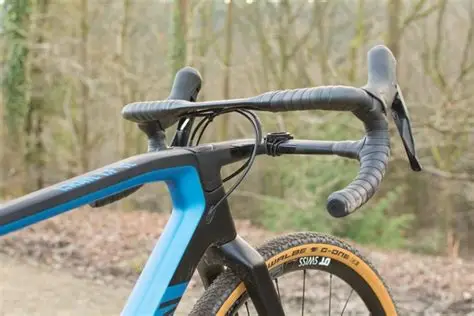
Gravel handlebars look like drop bars but wider, flared out at the bottom. They’re designed for people who ride both pavement and dirt in one trip.
Why I love them
I put a set of gravel bars on my “do‑everything” bike last year. On paved roads, I can still get aero in the drops. On a washboard gravel road, the extra width (about 46‑52cm) kept me from losing control – something standard road drops couldn’t do.
They have a longer reach and deeper drop than road bars, so you can shift between an aggressive race position and an upright relaxed one. Plus, many come with mounting points for bags and lights – great for bike camping.
The catch
They’re more expensive. A decent alloy gravel bar runs $60‑100, carbon over $200. And the flared bottom takes a few rides to get used to – I kept grabbing air at first.
Who should get them
Mixed‑terrain riders, bike packers, commuters with rough roads. Not for pure road racers or downhill MTB.
6. Aero tri bars – only for time trials and triathlons (seriously)
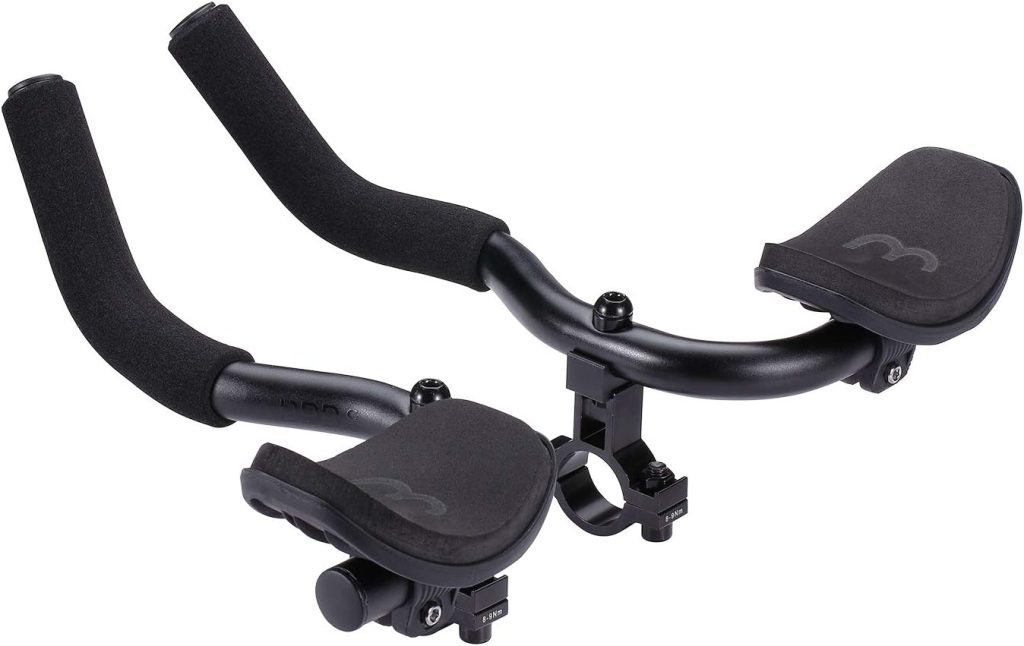
These are the weird ones: a narrow base bar with two padded armrests sticking forward. You tuck your elbows on the pads and lean way forward.
The speed gain is real
I tried a friend’s tri bike on a closed loop – at 35 km/h, the wind noise dropped noticeably. You can save 20‑30 watts just by the position. That’s why every time trial and triathlon uses them.
But here’s the danger
You lose almost all steering control. Forget riding these in traffic, on descents, or anywhere you need to turn quickly. Also, holding that position requires core strength – after 20 minutes my lower back was screaming.
Most are carbon fiber (light, stiff) with aluminum extensions. Some official races actually ban aero bars outside of individual time trials, so always check the rules.
Bottom line
Buy these only if you compete in triathlons or TTs. Never for commuting, gravel, or group rides.
What else matters? (from my trial‑and‑error notes)
Material – the big three
- Aluminum – cheapest, tough, good enough for 90% of riders. I’ve crashed aluminum bars and kept riding.
- Carbon fiber – lighter, smoother ride, but expensive and can crack on sharp impacts. Great for long road rides, bad for rocky trails.
- Steel – almost unbreakable, but heavy (400‑600g!) and harsh. You’ll only find it on retro cruisers and cheap city bikes.
Width – stability vs. agility
Wider handlebars (over 700mm) feel super stable off‑road but suck in tight city gaps. Narrow bars (under 400mm) turn quickly but feel twitchy on loose terrain. Rule of thumb: match road drop bar width to your shoulder width. For MTB, go a bit wider.
Clamp diameter – don’t ignore this
Three sizes: 31.8mm (modern standard, fits most), 25.4mm (old bikes and very cheap ones), and 35mm (high‑end racing/enduro – needs a special stem).
I once bought a 31.8mm bar for a 25.4mm stem – it never clamped right and slipped mid‑ride. Scary. Don’t be me.
Reach, drop, tilt
These determine how far you lean. Short reach + shallow drop = relaxed. Long reach + deep drop = aggressive racing. If you have neck or lower back issues, avoid deep drop bars like the plague.
How to pick your handlebar (in 3 real steps)
Step 1 – Be honest about where you ride
- City & short trips → flat bars or risers.
- Casual & slow → cruiser bars.
- Long pavement & road training → drop bars.
- Mixed pavement & dirt → gravel bars.
- Rock gardens & downhill → wide risers.
- Racing against the clock → aero bars (but only for that).
Step 2 – Fit it to your body
If your waist or neck hurts after riding, chances are your handlebar reach or drop is wrong.
- Shoulder width: drop bars should match it. MTB bars can be 1‑2 inches wider.
- Short arms? Pick short reach / shallow drop.
- Tall and flexible? Long reach / deep drop might work.
- Back problems? Riser bars or cruiser bars – never low aero positions.
Step 3 – Let your budget decide the material
- Under $100 and daily abuse → aluminum. It’s totally fine.
- Over 200 km/week and want luxury → carbon fiber for road, aluminum still for MTB.
One more thing – if you can, visit a local shop and test ride a few bikes. Just sitting on them for 2 minutes tells you more than reading 10 guides. No shop nearby? Find online reviews from riders with your same height and riding style. That’s how I avoided my fourth mistake.
Happy riding – and may your next handlebar not make your hands go numb.
- How to Choose Your First Carbon Wheelset
- Best Wheels for Climbing: The Climbing Wheelset Guide
- Are Carbon Wheels Really Worth It?
- 50mm vs 60mm Carbon Wheels: Which One Actually Fits the Way You Ride?
- What Are Carbon Wheels? A Simple Guide to Carbon Bike Wheels
- Are Carbon Wheels Worth It? A Clear Guide to Real Benefits, Rider Types, and Buying Tips
- Why Are Modern Bicycle Rims Getting Wider? Understanding the Real Logic Behind Rim Width
- Hooked vs Hookless Rims: Which Is Better for Road Cycling?
- Carbon vs Aluminum Wheels: Which Is Better for Road Cycling?
- Winter Cycling Safety: The Ultimate Guide to Riding in Snow and Ice