Provide Sustainable Electric Bikes For Everyone
Malesuada fames ac turpis egestas. Interdum velit laoreet id donec. Eu tincidunt tortor aliquam nulla facilisi cras.
Walk into any bike shop or browse an online cycling store, and you’ll be faced with a dizzying array of bike pedals—flat pedals, clipless pedals, platform pedals, mountain bike pedals, road bike pedals, and more, each with different shapes, materials, and features. For many riders, from complete beginners to seasoned enthusiasts, choosing the right bike pedals feels like navigating a maze: too often, riders settle for the pedals that come stock on their bike, or they buy a pair based solely on appearance, only to end up with uncomfortable, inefficient, or even unsafe pedals that detract from their riding experience. The truth is, bike pedals are far more than just a “footrest”—they are the critical connection between your body and your bike, the interface that transfers your pedaling power to the drivetrain, and a key factor in your comfort, safety, and performance.
Table of Contents
As a bike product adaptation consultant with over 12 years of experience helping riders of all levels find the perfect pedal match, I’ve seen firsthand how the right pedals can transform a frustrating ride into an effortless one, and how the wrong pedals can lead to fatigue, pain, and even injury. The goal of this guide is to demystify bike pedal selection, breaking down the process into clear, actionable steps that anyone can follow. We’ll start by addressing the most common pain points riders face when choosing pedals, then dive into the core factors that determine which pedals are right for you—your riding style, your bike type, your physical needs, and your personal preferences. We’ll also explore the different types of pedals in detail, debunk common myths, and provide real-world examples to help you make an informed decision. By the end of this guide, you’ll not only know how to choose the suitable bike pedals for your bike but also understand why each choice matters, ensuring that you get the most out of every ride.
Unlike other cycling components, pedals are not a “one-size-fits-all” accessory. A pedal that works perfectly for a road cyclist training for a marathon will be a poor choice for a mountain biker tackling technical trails, just as a pedal designed for a casual commuter will not meet the needs of a competitive triathlete. The key to choosing the right pedals is to align your selection with your specific use case, and to prioritize the features that matter most to you—whether that’s comfort, power transfer, ease of use, or durability. To make this process easier, think of your bike pedals as the “shoes” of your bike: just as you wouldn’t wear high heels to hike a mountain or running shoes to attend a formal event, you shouldn’t choose pedals that are mismatched to your riding style. This analogy isn’t just a metaphor—it’s a practical way to frame your decision, as the relationship between your feet and your pedals is just as important as the relationship between your feet and your shoes.
Before we dive into how to choose the right pedals, it’s important to understand why choosing the wrong ones can be such a problem. Many riders underestimate the impact of pedals on their riding experience, but the consequences of a poor choice are far-reaching. From my experience, the most common pain points associated with ill-fitting or mismatched pedals include:
Fatigue and reduced efficiency: When your pedals don’t align with your foot position or riding style, you’ll waste energy with every pedal stroke. For example, a flat pedal with no grip can cause your feet to slip, forcing you to exert extra effort to keep your feet in place, which leads to faster leg fatigue. Similarly, clipless pedals that are too stiff or poorly positioned can restrict your natural pedaling motion, reducing the amount of power you transfer to the bike and making even short rides feel exhausting.
Discomfort and pain: Uncomfortable pedals can cause a range of issues, from sore feet and ankles to knee and hip pain. Flat pedals with a narrow platform can put pressure on the balls of your feet, leading to numbness or pain after just 30 minutes of riding. Clipless pedals that are the wrong size or have an incorrect cleat position can alter your knee alignment, leading to overuse injuries over time. I’ve worked with countless riders who assumed their knee pain was due to a problem with their bike frame or their riding technique, only to find that the issue was simply the wrong pair of pedals.
Safety risks: Pedals that don’t grip your feet properly or that are difficult to engage/disengage can lead to accidents. For mountain bikers, a flat pedal with worn grip pins can cause your foot to slip off during a technical descent, potentially leading to a crash. For road cyclists, clipless pedals that are too tight or that require excessive force to release can make it difficult to unclip in an emergency, increasing the risk of falling. Even casual commuters can face risks—pedals that are loose, damaged, or mismatched to their shoes can cause slips, especially in wet or icy conditions.
Wasted money: Many riders buy pedals without doing their research, only to realize they’re not suitable for their needs and have to buy a second pair. A high-quality pair of pedals can cost anywhere from $30 to $300 or more, so making the wrong choice can be a costly mistake. From a professional perspective, it’s far better to invest time in researching the right pedals upfront than to waste money on a pair that doesn’t work for you.
According to industry data, approximately 40% of riders report being dissatisfied with their bike pedals, and nearly 25% of riders have experienced pain or injury related to poor pedal selection. This highlights just how common this problem is—and how important it is to choose the right pedals for your bike and your riding style. The good news is that with the right knowledge and guidance, anyone can avoid these pain points and find pedals that enhance their riding experience.
The single most important factor in choosing the right bike pedals is your riding style. Your riding style determines the type of pedal you need, as well as the features you should prioritize. There is no “best” pedal overall—only the best pedal for how you ride. Below, we’ll break down the most common riding styles and the pedal types that are best suited for each, with detailed insights to help you align your selection with your needs.
Riding style description: Casual commuting and recreational riding typically involves short to medium-length rides (1–10 miles) on paved roads, bike paths, or gentle trails. The primary goals are comfort, convenience, and ease of use—most riders in this category want to hop on their bike and ride without having to worry about special shoes or complicated pedal systems. Riders in this category often wear regular shoes (sneakers, loafers, etc.) rather than cycling-specific footwear.
Best pedal types: Flat pedals (also known as platform pedals) are the ideal choice for casual commuting and recreational riding. Flat pedals are simple, easy to use, and compatible with any type of shoe, making them perfect for riders who want convenience and versatility. Look for flat pedals with a wide platform (at least 90mm wide) to distribute pressure evenly across your foot, reducing discomfort. Grip pins are also a plus—they provide extra traction, preventing your feet from slipping, especially in wet conditions. However, avoid flat pedals with overly long grip pins if you often walk in your cycling shoes, as they can be uncomfortable on hard surfaces.
Key features to prioritize: Wide platform, moderate grip pins, lightweight design, and durability. From a practical standpoint, pedals with a sealed bearing system are also a good choice for commuters, as they require less maintenance and are more resistant to dirt, dust, and water.
Real-world example: A commuter who rides 3 miles to work every day in sneakers would benefit from a pair of flat pedals with a 95mm wide platform and rubber grip pads. These pedals provide enough traction to prevent slipping in the rain, and the wide platform ensures comfort during the short ride. They also allow the commuter to hop off the bike and walk into the office without any discomfort, as the grip pads are not overly aggressive.
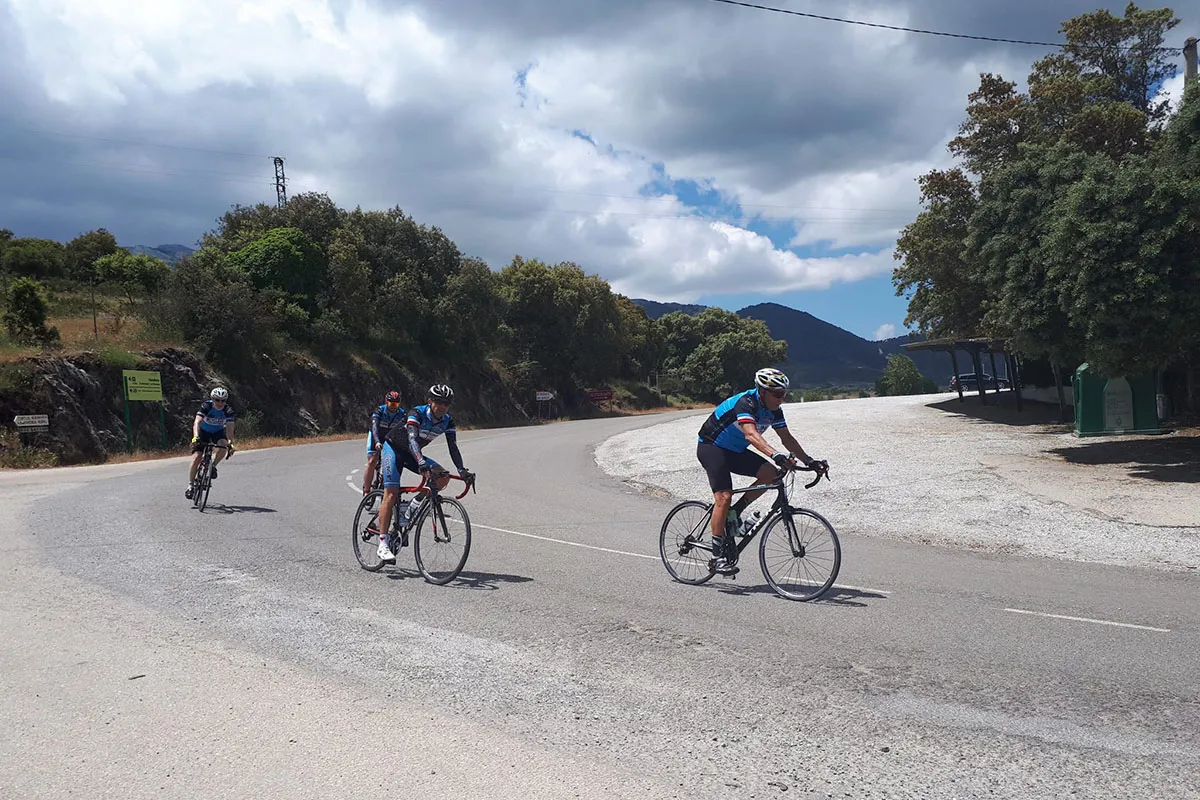
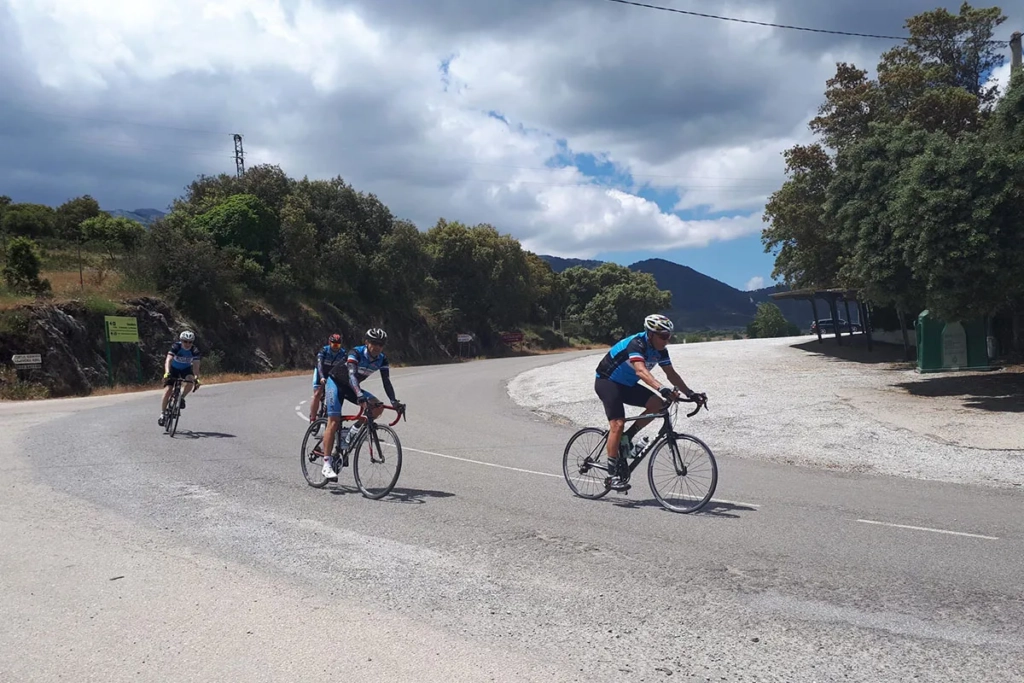
Riding style description: Road cycling focuses on riding on paved roads, with rides ranging from short leisure rides to long-distance centuries (100 miles) and competitive races. The primary goals are speed, efficiency, and power transfer—road cyclists want to maximize the amount of energy they transfer from their legs to the bike with every pedal stroke. Most road cyclists wear cycling-specific shoes with stiff soles, which help to distribute pedaling force evenly and reduce foot fatigue.
Best pedal types: Clipless pedals are the standard choice for road cycling, as they provide a secure connection between your foot and the pedal, allowing for more efficient power transfer. Unlike the name suggests, clipless pedals require you to “clip in” your cycling shoes using a cleat that attaches to the bottom of the shoe. There are two main types of clipless pedals for road cycling: SPD-SL pedals and Look pedals (also known as Keo pedals).
SPD-SL pedals are designed for road cycling and feature a large, wide cleat that provides a stable platform and efficient power transfer. They are compatible with road cycling shoes that have a three-bolt cleat pattern, and they offer a low stack height (the distance between the bottom of your shoe and the pedal), which helps to improve pedaling efficiency. Look pedals are similar to SPD-SL pedals but use a different cleat design—they are also compatible with three-bolt road shoes and are popular among competitive cyclists for their quick engagement and release.
Key features to prioritize: Low stack height, wide cleat platform, quick engagement and release, and lightweight design. For competitive road cyclists, pedal weight is especially important—lighter pedals reduce the overall weight of the bike, which can improve speed and acceleration. For leisure road cyclists, comfort and ease of use are more important, so look for clipless pedals with an adjustable release tension, which allows you to customize how easy it is to unclip.
Real-world example: A leisure road cyclist who rides 20–30 miles on weekends would benefit from a pair of SPD-SL clipless pedals with an adjustable release tension. These pedals provide efficient power transfer, making the ride easier, and the adjustable release tension ensures that the rider can unclip easily in an emergency. A competitive road cyclist training for a century ride would likely choose a lightweight carbon fiber clipless pedal with a low stack height, as these features maximize speed and efficiency.
Riding style description: Mountain biking involves riding on off-road trails, with varying terrain ranging from smooth cross-country trails to technical downhill descents. The primary goals are control, traction, and durability—mountain bikers need pedals that can handle rough terrain, provide a secure grip, and withstand impacts. Mountain bikers often wear cycling shoes with stiff soles and reinforced toes for protection, and many choose shoes with recessed cleats (for clipless pedals) or sticky rubber soles (for flat pedals).
Best pedal types: Mountain bikers have two main options: flat pedals and clipless pedals (SPD pedals). The choice between the two depends on the type of mountain biking you do and your personal preference.
Flat pedals are popular among downhill and trail mountain bikers, as they allow for quick foot movement and easy disengagement in technical terrain. They feature a wide platform (100mm or wider) and aggressive grip pins that bite into the sticky rubber soles of mountain biking shoes, providing maximum traction. Flat pedals are also more durable than clipless pedals, as they have fewer moving parts and can withstand impacts from rocks and roots.
SPD clipless pedals are designed for mountain biking and feature a small, two-bolt cleat that is recessed into the bottom of mountain biking shoes. This recessed cleat allows you to walk normally when off the bike, which is important for mountain bikers who often have to hike-a-bike over technical terrain. SPD pedals provide a secure connection between your foot and the pedal, allowing for efficient power transfer during climbs, and they offer a quick release mechanism that allows you to unclip easily in an emergency.
Key features to prioritize: For flat mountain bike pedals, prioritize a wide platform, aggressive grip pins, sealed bearings, and durable materials (such as aluminum or chromoly steel). For SPD clipless pedals, prioritize quick engagement and release, adjustable release tension, recessed cleats, and durability. It’s also important to choose pedals that are compatible with your mountain biking shoes—most mountain biking shoes are compatible with SPD cleats, but some are designed specifically for flat pedals.
Real-world example: A trail mountain biker who rides technical terrain with a mix of climbs and descents might choose SPD clipless pedals, as they provide efficient power transfer for climbs and quick release for descents. A downhill mountain biker who focuses on high-speed descents and technical features would likely choose flat pedals with a 110mm wide platform and aggressive grip pins, as they provide maximum control and traction.
Riding style description: Gravel and adventure cycling combines elements of road cycling and mountain biking, involving rides on unpaved roads, gravel paths, and remote trails. The primary goals are versatility, comfort, and durability—gravel riders need pedals that can handle a variety of terrain, from smooth gravel to rough dirt roads, and that are comfortable for long-distance rides. Gravel riders often wear cycling shoes that are a hybrid of road and mountain biking shoes—stiff enough for efficient power transfer, but with recessed cleats or sticky soles for walking.
Best pedal types: Gravel cycling pedals need to be versatile, so the best options are SPD clipless pedals or dual-platform pedals (also known as combination pedals). SPD clipless pedals are ideal for gravel riders who want efficient power transfer during long climbs but also need to walk off the bike (thanks to the recessed cleats). Dual-platform pedals feature a flat side for casual riding in regular shoes and a clipless side for use with cycling shoes, making them perfect for gravel riders who want versatility—they can clip in for long rides or ride in sneakers for casual gravel adventures.
Key features to prioritize: Versatility, durability, and comfort. For SPD clipless pedals, look for adjustable release tension and recessed cleats. For dual-platform pedals, look for a wide flat side with grip pins and a clipless side that is compatible with SPD cleats (the most common type for gravel cycling). Sealed bearings are also important for gravel pedals, as they protect against dirt and dust from unpaved roads.
Real-world example: An adventure cyclist planning a multi-day gravel ride through remote trails would benefit from a pair of SPD clipless pedals. These pedals provide efficient power transfer for long days in the saddle, and the recessed cleats allow for easy walking when exploring remote areas or fixing a flat tire. A casual gravel rider who sometimes rides in sneakers and sometimes in cycling shoes would choose dual-platform pedals, which offer the best of both worlds.
Riding style description: BMX and freestyle riding involves performing tricks, jumps, and stunts on a BMX bike, either in a skate park or on the street. The primary goals are control, grip, and durability—BMX riders need pedals that can withstand impacts from jumps and tricks, provide a secure grip, and allow for quick foot movement. BMX riders typically wear flat-soled sneakers with sticky rubber, which provide extra traction on the pedals.
Best pedal types: Flat pedals are the only choice for BMX and freestyle riding, as they allow for quick foot movement and easy adjustment during tricks. BMX flat pedals are designed to be extremely durable, with a thick, sturdy platform (usually made of aluminum or chromoly steel) and aggressive grip pins that bite into the soles of sneakers. They also have a large surface area to provide maximum control, even when performing tricks.
Key features to prioritize: Durability, aggressive grip pins, large platform, and a sealed bearing system. BMX pedals need to be able to withstand repeated impacts, so look for pedals made of high-quality materials with a strong axle. Aggressive grip pins are essential for keeping your feet in place during tricks, and a sealed bearing system ensures that the pedals spin smoothly even after exposure to dirt and dust.
Real-world example: A BMX rider who performs tricks in a skate park would choose a pair of flat pedals with a 100mm wide platform, aggressive grip pins, and a chromoly steel axle. These pedals are durable enough to withstand impacts from jumps, and the grip pins provide the traction needed to perform tricks without slipping.
While your riding style is the foundation of pedal selection, it’s equally important to ensure that the pedals you choose are compatible with your bike. Not all pedals fit all bikes—bike pedals come in different axle sizes, and different bike types have different pedal thread standards. Choosing pedals that are incompatible with your bike will result in a poor fit, reduced performance, and even potential damage to your bike’s crankset. Below, we’ll break down the key compatibility factors to consider, along with guidance for different bike types.
The axle is the part of the pedal that attaches to the bike’s crankset, and it comes in three standard sizes: 9/16-inch, 1/2-inch, and 12mm. The size you need depends on your bike type and crankset:
How to determine your axle size: The easiest way to determine your bike’s pedal axle size is to check your current pedals (if you have them) or consult your bike’s owner’s manual. If you don’t have your owner’s manual, you can measure the diameter of the pedal hole in your crankset using a caliper. A 9/16-inch axle hole is approximately 14.3mm in diameter, a 1/2-inch axle hole is approximately 12.7mm in diameter, and a 12mm thru-axle hole is exactly 12mm in diameter.
Different bike types have different requirements when it comes to pedals, beyond just axle size. Below, we’ll outline the specific pedal compatibility considerations for each common bike type:
Road bikes are designed for speed and efficiency, so they require pedals that are lightweight, low-profile, and compatible with road cycling shoes. Most road bikes use a 9/16-inch axle, and they are compatible with all types of road clipless pedals (SPD-SL, Look) and high-quality flat pedals. However, it’s important to note that road bikes with carbon fiber cranksets require pedals that are lightweight and have a smooth axle, to avoid damaging the crankset.
Mountain bikes are designed for off-road use, so they require pedals that are durable, stiff, and compatible with mountain biking shoes. Most mountain bikes use a 9/16-inch axle, and they are compatible with SPD clipless pedals and mountain bike flat pedals. Some high-end mountain bikes use 12mm thru-axle pedals, which are stiffer and more durable. It’s also important to consider the crankset type—some mountain bike cranksets have a wider Q-factor (the distance between the two pedals), so you may need pedals that are designed to accommodate this.
Gravel bikes are versatile, so they require pedals that are compatible with both road and mountain biking shoes. Most gravel bikes use a 9/16-inch axle, and they are compatible with SPD clipless pedals (which use two-bolt cleats) and dual-platform pedals. Gravel bikes with carbon fiber cranksets should use lightweight pedals, similar to road bikes, while gravel bikes with aluminum cranksets can use more durable, heavier pedals.
Commuter bikes are designed for convenience and comfort, so they require pedals that are easy to use and compatible with regular shoes. Most commuter bikes use a 9/16-inch axle, and they are compatible with flat pedals and dual-platform pedals. Commuter bikes with steel cranksets are more durable, so they can handle heavier pedals, while commuter bikes with aluminum cranksets should use lightweight pedals.
BMX bikes are designed for tricks and stunts, so they require pedals that are durable and compatible with BMX-specific axles. Most BMX bikes use a 1/2-inch axle, and they are compatible with BMX flat pedals. Some high-end BMX bikes use a 9/16-inch axle, but this is less common. BMX pedals must be able to withstand impacts, so they are typically made of thick aluminum or chromoly steel.
Children’s bikes are designed for small riders, so they require pedals that are small, lightweight, and compatible with children’s shoe sizes. Most children’s bikes use a 1/2-inch axle, and they are compatible with small flat pedals. It’s important to choose pedals that are the right size for your child’s feet—too large, and their feet won’t fit properly; too small, and they’ll be uncomfortable.
Worth noting: If you’re unsure about pedal compatibility with your bike, it’s always best to consult a professional bike mechanic or the bike manufacturer. Using incompatible pedals can damage your crankset, reduce pedal performance, and even pose a safety risk.
Even if you choose pedals that are compatible with your riding style and bike type, they won’t be suitable if they don’t fit your physical needs and provide adequate comfort. Every rider has different foot shapes, sizes, and physical limitations, so it’s important to choose pedals that accommodate these differences. Below, we’ll explore the key physical factors to consider when choosing bike pedals, along with tips to ensure maximum comfort.
Your foot size is a critical factor in pedal selection, as it determines the ideal platform width for your pedals. A pedal with a platform that is too narrow will concentrate pressure on the balls of your feet, leading to numbness and pain, while a pedal with a platform that is too wide will cause your feet to shift, reducing control and efficiency.
As a general rule of thumb, the width of the pedal platform should be approximately equal to the width of your foot at the ball (the widest part of your foot). To measure this, place your foot on a piece of paper, trace the outline, and measure the width at the ball of your foot. Then, choose a pedal with a platform width that matches this measurement (or is slightly wider, by 5–10mm, for extra comfort).
For example, a rider with a foot width of 85mm would benefit from a pedal with a platform width of 85–95mm, while a rider with a foot width of 100mm would need a pedal with a platform width of 100–110mm. This rule applies to both flat pedals and clipless pedals—clipless pedals with a wider cleat platform will provide more comfort for riders with larger feet.
Riders with high arches or flat feet often struggle with pedal comfort, as standard pedals may not provide adequate support. For riders with high arches, pedals with a slightly curved platform can help to distribute pressure evenly across the foot, reducing strain on the arch. For riders with flat feet, pedals with a flat platform and extra cushioning (such as rubber grip pads) can provide additional support, preventing the foot from collapsing inward.
Clipless pedals also offer options for arch support—some clipless pedals come with adjustable insoles or cleat positions that allow you to customize the foot position, providing better arch support. For example, SPD-SL pedals with a wide cleat platform can help to support riders with high arches, while clipless pedals with a low stack height can help to align the foot properly for riders with flat feet.
For riders using clipless pedals, cleat position is a critical factor in knee comfort and alignment. The cleat is the small metal or plastic piece that attaches to the bottom of your cycling shoe and clips into the pedal. The position of the cleat determines how your foot is aligned on the pedal, which in turn affects your knee alignment during pedaling.
Poor cleat position can lead to knee pain, as it forces your knee to track inward or outward during each pedal stroke. To avoid this, the cleat should be positioned so that your knee is directly over your ankle when the pedal is in the 3 o’clock position (the bottom of the pedal stroke). This alignment ensures that your knee moves in a straight line, reducing strain on the knee joint.
There are three main adjustments to cleat position: fore/aft (forward/backward), medial/lateral (inward/outward), and rotation. The fore/aft adjustment determines how far forward or backward your foot is positioned on the pedal—most riders benefit from positioning the cleat so that the ball of their foot is directly over the pedal axle. The medial/lateral adjustment determines how far inward or outward the cleat is positioned—this adjustment is especially important for riders with wide or narrow hips, as it helps to align the foot with the hip width. The rotation adjustment allows you to tilt the cleat slightly inward or outward, which can help to accommodate riders with different foot angles.
If you’re new to clipless pedals, it’s best to start with the cleat in the neutral position (centered fore/aft, medial/lateral, and no rotation) and adjust it gradually based on comfort. If you experience knee pain, try adjusting the cleat slightly outward (for knee pain on the inside of the knee) or inward (for knee pain on the outside of the knee).
Every pedal has a weight capacity, which is the maximum weight the pedal can safely support. It’s important to choose pedals with a weight capacity that exceeds your body weight, as this ensures that the pedals are strong enough to handle your pedaling force and any impacts.
Most adult pedals have a weight capacity of 250–300 pounds (113–136 kg), which is sufficient for most riders. However, if you are a heavier rider (over 250 pounds) or if you ride aggressively (such as downhill mountain biking), you’ll need pedals with a higher weight capacity (300 pounds or more). Flat pedals are typically stronger than clipless pedals, so they are a better choice for heavier riders or aggressive riding styles.
The materials and construction of a pedal have a significant impact on its durability, weight, performance, and comfort. Different materials offer different benefits, so it’s important to choose pedals made from materials that align with your riding style and needs. Below, we’ll break down the most common pedal materials and construction features, along with their pros and cons.
The body of the pedal is the part you stand on, and it is typically made from one of four materials: plastic, aluminum, carbon fiber, or chromoly steel. Each material has its own advantages and disadvantages:
Plastic pedals are the most affordable option, and they are commonly found on entry-level bikes and children’s bikes. They are lightweight (typically 200–300 grams per pair) and easy to manufacture, but they are not very durable. Plastic pedals can crack or break under heavy use or impacts, and they tend to wear out quickly, especially if exposed to dirt and water. Plastic pedals are best suited for casual riders who ride infrequently and do not put a lot of stress on their pedals.
Aluminum is the most common material used for high-quality pedals, and it is suitable for most riding styles. Aluminum pedals are durable, lightweight (typically 300–500 grams per pair), and affordable, making them a great balance between performance and value. They are resistant to impacts and wear, and they can withstand exposure to dirt, dust, and water. Aluminum pedals are available in both flat and clipless designs, and they are suitable for commuters, road cyclists, mountain bikers, and gravel riders.
There are two types of aluminum pedals: forged aluminum and CNC-machined aluminum. Forged aluminum pedals are made by heating aluminum and shaping it under pressure, which makes them stronger and more durable than CNC-machined aluminum pedals. CNC-machined aluminum pedals are made by cutting aluminum with a computer-controlled machine, which makes them lighter and more precise, but slightly less durable. For aggressive riding styles (such as downhill mountain biking), forged aluminum pedals are the better choice.
Carbon fiber is a high-end material used for premium pedals, primarily for road cyclists and competitive mountain bikers. Carbon fiber pedals are extremely lightweight (typically 200–300 grams per pair), making them ideal for riders who want to reduce the overall weight of their bike. They are also stiff, which improves power transfer, and they have a smooth, sleek appearance.
However, carbon fiber pedals are expensive (often $200 or more per pair), and they are not as durable as aluminum or chromoly steel pedals. They can crack or break under heavy impacts, and they are more susceptible to damage from dirt and water. Carbon fiber pedals are best suited for competitive riders who prioritize weight and performance over durability, and who are willing to invest in a high-end product.
Chromoly steel is a strong, durable material used primarily for BMX pedals and aggressive mountain bike pedals. Chromoly steel pedals are extremely tough, able to withstand repeated impacts from jumps and tricks, and they are resistant to wear and tear. They are heavier than aluminum or carbon fiber pedals (typically 500–700 grams per pair), but their durability makes them worth the extra weight for BMX riders and downhill mountain bikers.
The axle is the part of the pedal that attaches to the crankset, and it is typically made from steel or titanium. Steel axles are the most common, and they are durable, strong, and affordable. Titanium axles are a high-end option, offering the same strength as steel but with a lighter weight. Titanium axles are ideal for competitive riders who want to reduce pedal weight without sacrificing strength, but they are expensive.
The bearing system is what allows the pedal to spin smoothly, and it is a critical factor in pedal performance and maintenance. There are two main types of bearing systems: loose ball bearings and sealed cartridge bearings.
Loose ball bearings are the traditional bearing system, consisting of small steel balls placed between the pedal body and the axle. They are affordable and easy to maintain—you can clean and repack them with grease to keep them spinning smoothly. However, loose ball bearings are more susceptible to dirt and water, which can cause them to wear out quickly if not maintained properly.
Sealed cartridge bearings are a more modern bearing system, consisting of a sealed unit that contains the bearings, grease, and a shield to keep out dirt and water. Sealed cartridge bearings are smoother, more durable, and require less maintenance than loose ball bearings—they typically last for thousands of miles without needing to be cleaned or repacked. However, they are more expensive than loose ball bearings, and if they fail, they must be replaced entirely (rather than just cleaned and repacked).
For most riders, sealed cartridge bearings are the better choice, as they provide a smoother ride and require less maintenance. For casual riders who are willing to perform regular maintenance, loose ball bearings are a more affordable option.
For flat pedals, grip and traction are critical, as they prevent your feet from slipping off the pedal. The most common grip features include grip pins, rubber grip pads, and textured surfaces:
When it comes to choosing bike pedals, there are many myths and misconceptions that can lead riders to make the wrong choice. As a product adaptation consultant, I hear these myths every day, and they often result in riders buying pedals that don’t meet their needs. Below, we’ll debunk the most common pedal myths, based on industry research and hands-on experience, to help you avoid costly mistakes.
False. While clipless pedals may seem intimidating at first, they are actually safer than flat pedals for most riders—when used correctly. The key is to choose clipless pedals with an adjustable release tension, which allows you to customize how easy it is to unclip. For beginners, set the release tension to the lowest setting, so that you can unclip with minimal force. With a little practice, clipping in and out becomes second nature, and clipless pedals provide a more secure connection between your foot and the pedal, reducing the risk of your foot slipping off in an emergency.
In fact, many beginners find that clipless pedals make riding easier, as they provide more efficient power transfer, reducing fatigue. The only time clipless pedals are dangerous is if you choose a pair with a fixed release tension (too tight) or if you don’t practice clipping in and out before riding in traffic.
False. While expensive pedals often offer better materials, lighter weight, and more features, they are not always the best choice for every rider. The best pedals for you are the ones that align with your riding style, bike type, and physical needs—not the ones with the highest price tag. For example, a casual commuter who rides once or twice a week does not need a $300 pair of carbon fiber clipless pedals; a $50 pair of aluminum flat pedals will work just fine. Conversely, a competitive road cyclist may benefit from a high-end pair of carbon fiber pedals, as the reduced weight and improved power transfer can make a difference in performance.
The key is to prioritize the features that matter most to you, and to choose pedals that offer the best value for your money. A mid-range pair of aluminum clipless pedals ($100–$150) will provide more than enough performance for most riders, without the high cost of premium pedals.
False. Flat pedals are not just for beginners—they are a popular choice among experienced riders, especially mountain bikers, BMX riders, and casual commuters. Many professional mountain bikers prefer flat pedals for technical terrain, as they allow for quick foot movement and easy disengagement, which is critical for safety. Flat pedals are also ideal for riders who want the flexibility to wear regular shoes, or who prefer the feel of a wide, stable platform.
The choice between flat pedals and clipless pedals is a matter of personal preference and riding style—not skill level. Some experienced riders swear by flat pedals, while others prefer clipless pedals—there is no right or wrong choice, only the choice that works best for you.
False. There are significant differences between different types of clipless pedals, and choosing the wrong type can lead to discomfort and reduced performance. As we discussed earlier, road clipless pedals (SPD-SL, Look) are designed for efficiency and speed, with a large, wide cleat that provides a stable platform. Mountain bike clipless pedals (SPD) are designed for versatility and ease of walking, with a small, recessed cleat that allows you to walk normally. These two types of clipless pedals are not compatible with the same shoes—road clipless pedals require three-bolt road shoes, while mountain bike clipless pedals require two-bolt mountain bike shoes.
It’s important to choose clipless pedals that are compatible with your riding style and shoes. For example, if you have road cycling shoes with a three-bolt cleat pattern, you cannot use SPD clipless pedals—you’ll need SPD-SL or Look pedals.
False. Pedals are a critical part of your bike’s performance, as they are the interface between your body and the drivetrain. The right pedals can improve power transfer, reduce fatigue, and enhance control, while the wrong pedals can do the opposite. For example, clipless pedals provide a more efficient power transfer than flat pedals, as they allow you to pull up on the pedal as well as push down, engaging more muscles and reducing fatigue. Flat pedals with a wide platform provide more control than narrow flat pedals, especially in technical terrain.
Industry tests have shown that riders using the right pedals can improve their pedaling efficiency by up to 15%, compared to riders using the wrong pedals. This means that the right pedals can help you ride faster, farther, and with less effort—making them just as important as the drivetrain.
Now that we’ve covered the core factors to consider, let’s put it all together into a step-by-step guide that you can follow to choose the suitable bike pedals for your bike. This guide is designed to be simple and actionable, regardless of your riding experience or bike type.
Start by asking yourself: How do I ride my bike? What are my primary goals? Are you a casual commuter, a road cyclist, a mountain biker, a gravel rider, or a BMX rider? Do you prioritize comfort, speed, control, or versatility? Answering these questions will help you narrow down the type of pedal you need (flat, clipless, dual-platform).
Next, determine your bike’s pedal axle size (9/16-inch, 1/2-inch, 12mm) and crankset type. This will ensure that the pedals you choose fit your bike properly. If you’re unsure, check your current pedals or consult your bike’s owner’s manual.
Measure your foot size to determine the ideal pedal platform width. Consider your arch type (high, flat, neutral) and any knee or foot pain you’ve experienced in the past. For clipless pedals, think about cleat position and how it will affect your knee alignment.
Based on your riding style, bike compatibility, and physical needs, evaluate the different types of pedals: – Flat pedals: Best for casual commuting, BMX, downhill mountain biking, and riders who want convenience. – Clipless pedals: Best for road cycling, cross-country mountain biking, gravel cycling, and riders who want efficiency. – Dual-platform pedals: Best for gravel riders, commuters, and riders who want versatility.
Prioritize features that matter most to you—for example, grip pins for mountain biking, low stack height for road cycling, or adjustable release tension for beginners.
Select pedals made from materials that align with your riding style and budget: – Plastic: Affordable, lightweight, best for casual riders. – Aluminum: Durable, balanced, best for most riders. – Carbon fiber: Lightweight, high-performance, best for competitive riders. – Chromoly steel: Strong, durable, best for BMX and downhill mountain biking.
Choose a bearing system (sealed cartridge or loose ball) based on your maintenance preferences—sealed cartridge bearings require less maintenance, while loose ball bearings are more affordable.
If you have the opportunity, test the pedals before buying them. Many bike shops allow riders to test pedals on a stationary bike or take a short test ride. Testing the pedals will help you determine if they are comfortable, if they fit your feet properly, and if they meet your performance needs.
Once you’ve purchased your pedals, install them on your bike and adjust them for optimal comfort and performance. For flat pedals, ensure that they are tightened securely and that the grip pins are in good condition. For clipless pedals, adjust the cleat position and release tension to fit your needs. Take a short ride to test the adjustments, and make any necessary changes.
To help you better understand how to apply the information in this guide, let’s look at three real-world case studies of riders who struggled with pedal selection, and how they found the perfect pedals for their needs. These case studies highlight different riding styles, physical needs, and compatibility issues, providing practical examples to guide your decision.
Rider profile: Sarah, 32, a casual commuter who rides 2 miles to work every day in sneakers. She has a hybrid commuter bike with a 9/16-inch axle, and she was using the stock plastic flat pedals that came with her bike. Sarah’s pain points: Her feet would slip off the pedals in the rain, and the narrow platform caused numbness in her feet after just 15 minutes of riding.
Solution: Sarah chose a pair of aluminum flat pedals with a 95mm wide platform, moderate grip pins, and rubber grip pads. The wide platform distributed pressure evenly across her feet, reducing numbness, and the grip pins and rubber pads provided extra traction in the rain. The aluminum construction was durable enough for daily use, and the sealed cartridge bearings required no maintenance. Sarah’s result: She no longer experiences foot numbness or slips, and her commute is now more comfortable and safe.
Rider profile: Mike, 45, a beginner road cyclist who rides 10–15 miles on weekends. He has a road bike with a 9/16-inch axle, and he was using flat pedals with his running shoes. Mike’s pain points: He was fatigued after short rides, and his feet would slip off the pedals when climbing hills. He wanted to try clipless pedals but was intimidated by the thought of clipping in and out.
Solution: Mike chose a pair of SPD-SL clipless pedals with an adjustable release tension, along with road cycling shoes with a three-bolt cleat pattern. He set the release tension to the lowest setting, allowing him to unclip easily, and practiced clipping in and out on a stationary bike before riding outside. The clipless pedals provided more efficient power transfer, reducing fatigue, and the secure connection prevented his feet from slipping. Mike’s result: He can now ride 20 miles without fatigue, and he feels confident clipping in and out—even in traffic.
Rider profile: Jake, 28, a technical mountain biker who rides trail and downhill terrain. He has a mountain bike with a 9/16-inch axle, and he was using SPD clipless pedals. Jake’s pain points: He struggled to unclip quickly during technical descents, leading to near-crashes, and his feet would slip off the pedals when riding in wet conditions.
Solution: Jake switched to a pair of aluminum flat pedals with a 110mm wide platform, aggressive grip pins, and sealed cartridge bearings. The wide platform and aggressive grip pins provided maximum traction, even in wet conditions, and the flat design allowed him to unclip quickly during descents. The aluminum construction was durable enough to handle impacts from rocks and roots. Jake’s result: He feels more in control on technical terrain, and he no longer has issues with slipping or slow unclipping—reducing his risk of crashes.
Choosing the suitable bike pedals for your bike is not a decision to be taken lightly—it’s an investment in your comfort, safety, and performance. The right pedals will make every ride more enjoyable, whether you’re commuting to work, exploring gravel trails, or racing down a mountain. The wrong pedals, on the other hand, can lead to fatigue, pain, and even injury, detracting from your riding experience.
The key takeaway from this guide is that there is no “best” pedal—only the best pedal for you. To find your perfect pedal, you need to define your riding style, check your bike’s compatibility, consider your physical needs, and evaluate the different types of pedals and features. By following the step-by-step guide and avoiding common myths, you can make an informed decision that will enhance your riding experience for years to come.
Remember, your pedals are the connection between your body and your bike—treat them with the same care and attention that you give to other important cycling components. Whether you choose flat pedals, clipless pedals, or dual-platform pedals, the most important thing is that they fit your needs, feel comfortable, and help you get the most out of every ride.
So, take the time to research, test, and adjust—your feet, your knees, and your bike will thank you. Happy riding!